Overview
This journey walks you through the full process of booking an appointment in Artie AI. You will use the appointment form at /appointments/new to select the relevant client, employee, and service, choose an available time slot, and save the booking. The appointment then appears in the calendar and list views with a color-coded status.
Prerequisites
- Role required: Admin, Manager, Receptionist, or Stylist (requires
appointment:createpermission) - Before you start: The client must already exist in the system (see Registering a New Client). At least one active employee and one active service must also be configured.
Open the Appointments Page
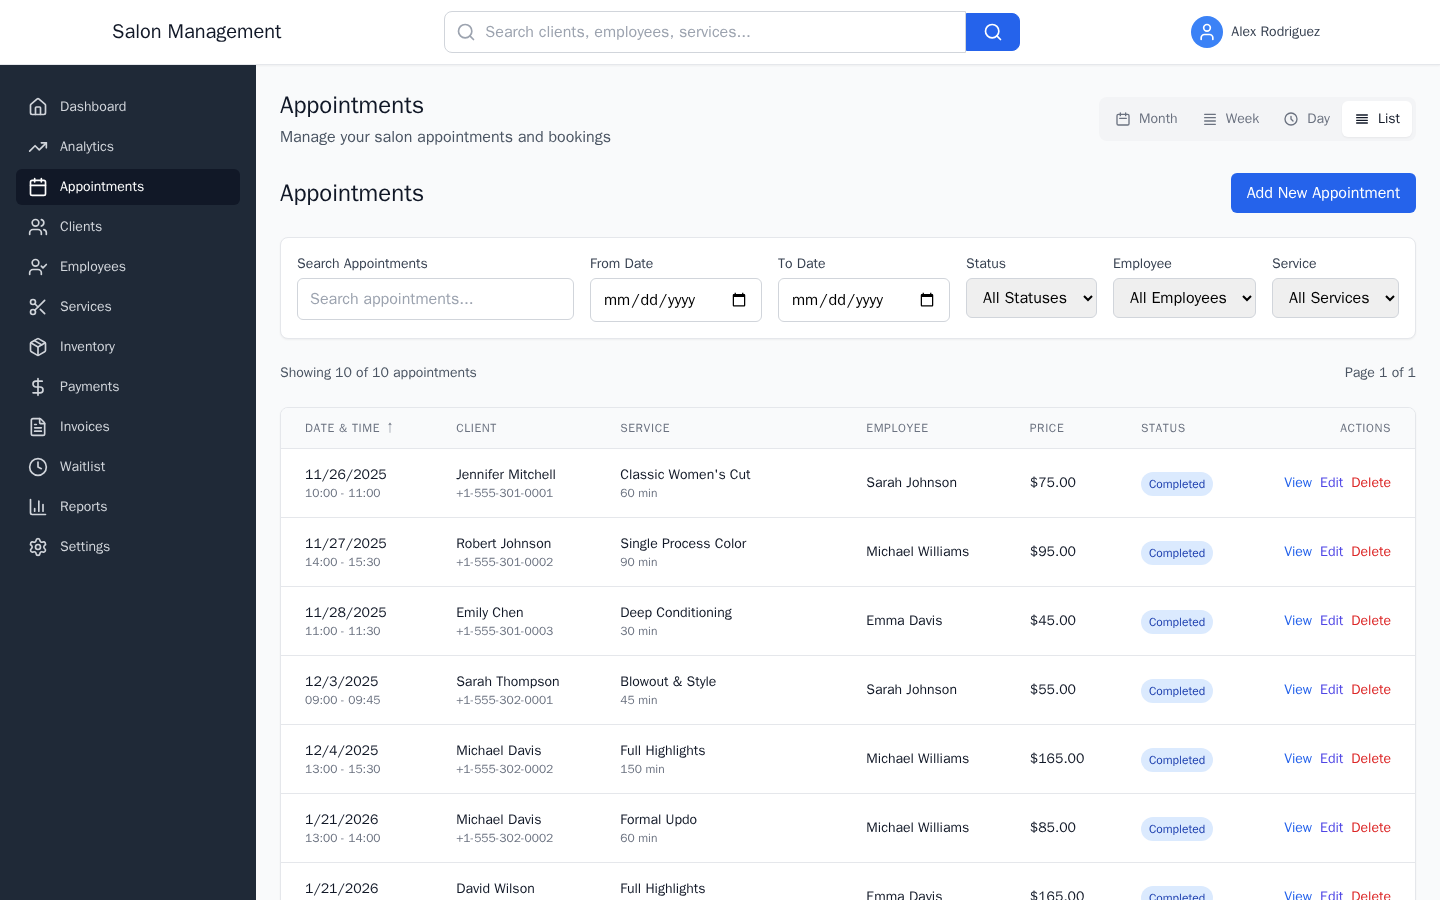
Click Appointments in the left sidebar. This takes you to /appointments.
What you'll see: The "Appointments" heading with the subheading "Manage your salon appointments and bookings". A view-mode toggle bar appears in the top-right of the header with four buttons: Month, Week, Day, and List. The platform remembers your last-used view and restores it on the next visit.
Explore the Calendar View
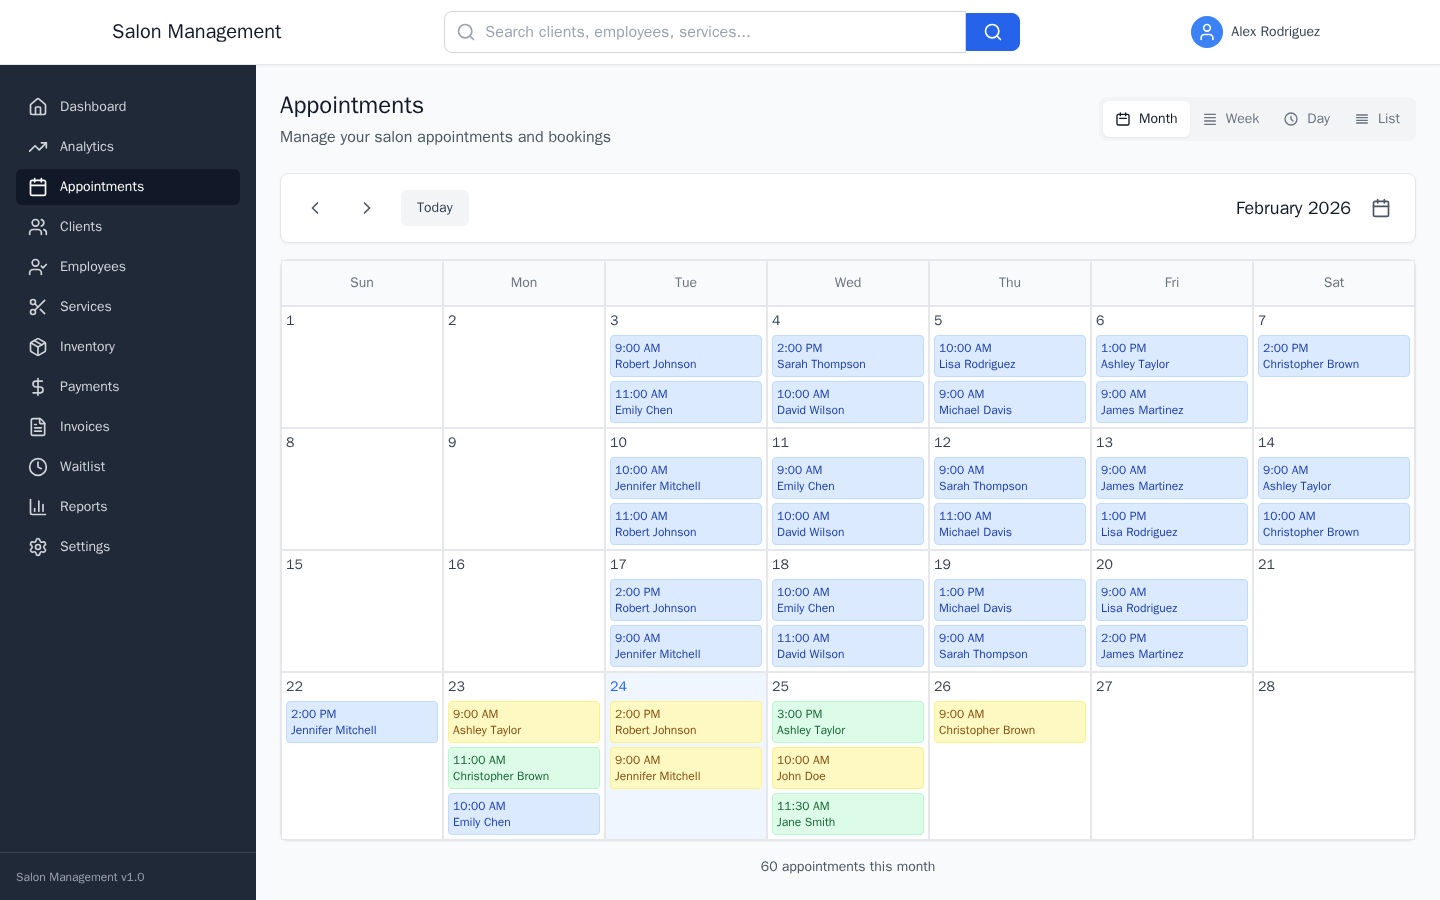
Use the view-mode toggle to switch between Month, Week, Day, and List views. In Month view, click any day to jump directly to the Day view for that date.
Open the New Appointment Form
Click New Appointment in the top-right area of the page. This navigates you to /appointments/new.
Alternatively, if you are already on the list view, you can find the "New" or "Add" action button rendered by the page header.
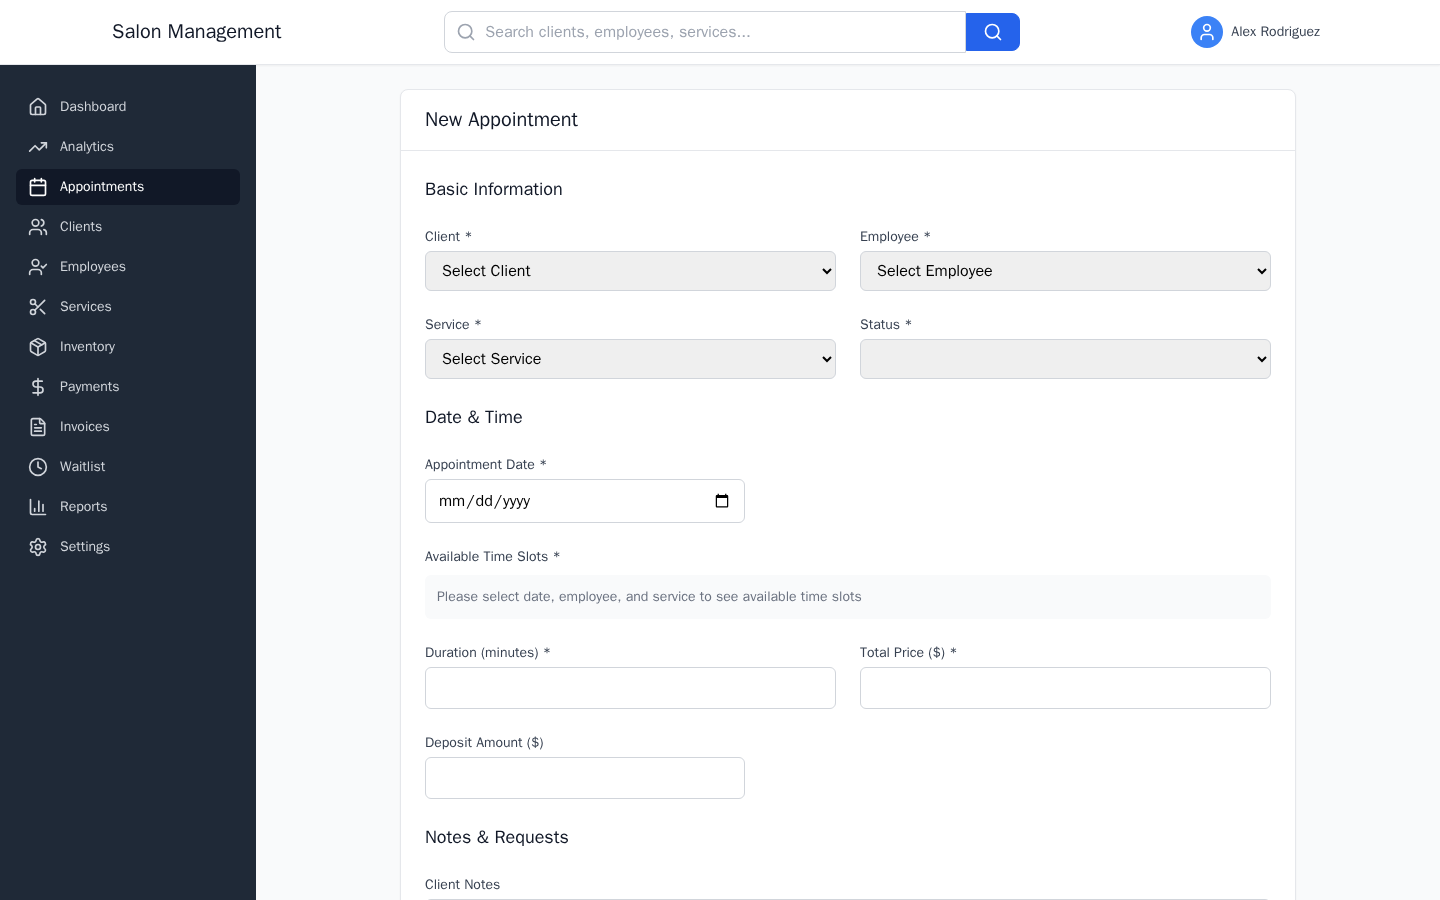
What you'll see: A form card headed "New Appointment" with four sections: Basic Information, Date & Time, Notes & Requests, and Recurring Options.
Fill In Basic Information
The Basic Information section contains four required dropdowns arranged in a two-column grid:
| Field | What to do |
|---|---|
| Client * | Select the client from the dropdown. The list shows each client's full name and email address. |
| Employee * | Select the staff member who will perform the service. The list shows name and position. |
| Service * | Select the service. The list shows service name, base price, and default duration in minutes. |
| Status | Choose the initial status for the appointment (defaults to "Pending"). |
When you select a Service, the form automatically fills in the Duration (minutes) and Total Price ($) fields based on the service's default values. You can override these values manually.
What you'll see: Each dropdown shows a placeholder ("Select Client", "Select Employee", "Select Service") until a choice is made. A red border and error message appear below any required field left empty on submit.
Select a Date
In the Date & Time section, click the Appointment Date date picker and choose a date. The picker enforces a minimum of today's date — past dates are not selectable for new bookings.
What you'll see: After you pick a date, and if you have already selected both an employee and a service, the Available Time Slots panel below the date picker loads automatically.
Choose an Available Time Slot
The Available Time Slots panel is a grid of time buttons. The system calls GET /available-slots using the employee, service, and date you selected.
| Button Color | Meaning |
|---|---|
| White | Available slot — click to select it |
| Blue (highlighted) | The currently selected slot |
| Gray | Unavailable — a small label explains the conflict reason |
What you'll see: If date, employee, and service are not all selected yet, a gray info box says "Please select date, employee, and service to see available time slots". While loading, a spinner is shown with "Checking availability...". If no slots are open, a yellow warning reads "No available time slots for the selected date and employee".
Review Pricing and Duration
Still in Date & Time, review or adjust:
| Field | Details |
|---|---|
| Duration (minutes) | Auto-filled from the service; minimum 5, maximum 480 |
| Total Price ($) | Auto-filled from the service base price; adjust if needed |
| Deposit Amount ($) | Optional; leave blank if no deposit is required |
Add Notes (Optional)
In the Notes & Requests section:
| Field | Visibility |
|---|---|
| Client Notes | Visible to the client |
| Internal Notes | Visible to staff only (shown with a yellow background on the detail page) |
| Special Requests | Client's specific preferences or requirements |
Set Recurring Options (Optional)
If this appointment repeats on a schedule, check the Recurring Appointment checkbox. A Recurring Pattern dropdown appears with four options: Weekly, Bi-weekly, Monthly, and Quarterly.
Leave the checkbox unchecked for a one-time appointment.
Save the Appointment
Click Create Appointment at the bottom-right of the form. While saving, the button shows "Saving...". On success, you are redirected to /appointments and the new appointment appears in your current view.
If validation fails, red error messages appear beneath each invalid field. Fix the errors and click Create Appointment again. Click Cancel to discard and return to the appointments list without saving.
What you'll see after saving: The appointment appears in the calendar or list view with a color-coded status badge:
| Status | Color |
|---|---|
| Confirmed | Green badge |
| Pending | Yellow badge |
| In Progress | Shown on detail page via check-in flow |
| Completed | Blue badge |
| Cancelled | Red badge |
| No Show | Gray badge |

Tips & Best Practices
- Select the Service first; the duration and price fields auto-fill, saving you manual entry.
- If no time slots appear after selecting date, employee, and service, the employee may be fully booked that day. Try a different date or employee.
- Use Internal Notes for sensitive information (e.g., allergy notes, stylist reminders) that the client should not see.
- The view-mode preference (Month / Week / Day / List) is saved in your browser's localStorage and persists across sessions — set your preferred view once and it will be remembered.
- In Month view, click any day to jump directly to the Day view for that date.
Common Issues
| Issue | Solution |
|---|---|
| Client dropdown is empty | The client does not exist yet. Register them first via Registering a New Client. |
| No time slots appear | Make sure all three fields (Date, Employee, Service) are selected. If still empty, the employee has no available slots on that day. |
| "Cannot book appointments in the past" error | The selected date is before today. Choose today or a future date. |
| "Selected time slot is not available" error | Another booking was made after the slots loaded. Refresh and choose a different slot. |
| Form redirects to login on submit | Your session expired. Log in again and re-enter the form data. |
Related Journeys
- Rescheduling & Canceling — Change or cancel an existing appointment
- First Login & Setup — Get oriented to the platform before booking
- Registering a New Client — Add a client before booking their appointment