Overview
Before you can book an appointment for a new client, they must be registered in Artie AI. This journey walks you through navigating to the Clients page, filling out the client registration form, saving the record, and then using the client detail page to add notes and view history. You will also learn how to search for and filter existing clients.
Prerequisites
- Role required: Admin, Manager, or Receptionist (requires
client:readpermission to see the Clients section) - Before you start: Have the client's basic contact information ready — at minimum their first and last name.
Open the Clients Page
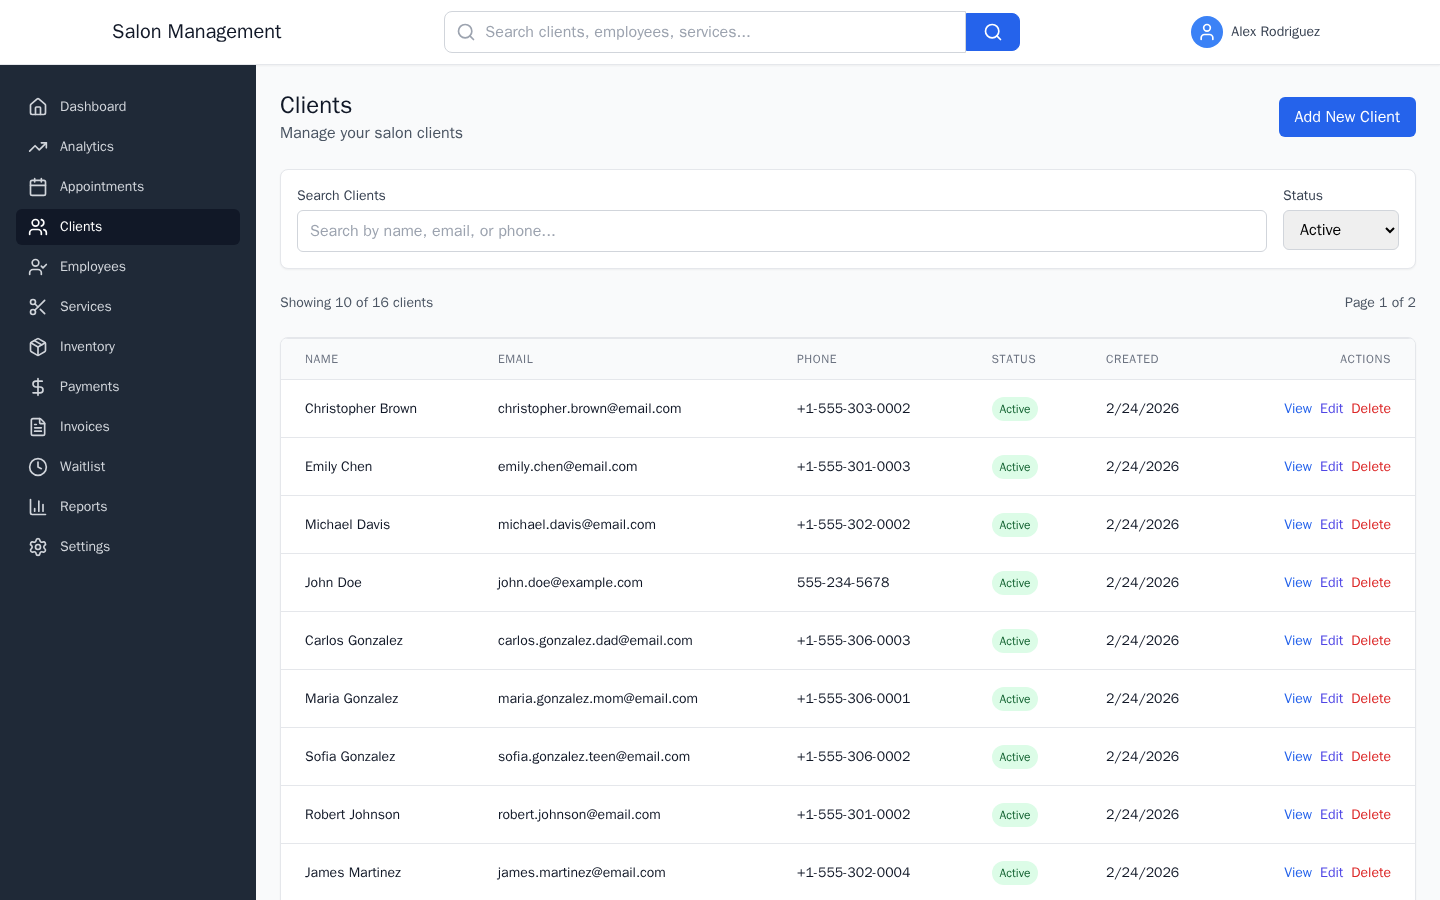
Click Clients in the left sidebar. This takes you to /clients.
What you'll see: The "Clients" heading with the subheading "Manage your salon clients". An Add New Client button appears in the top-right corner. Below the header, a search bar and a Status filter dropdown appear, followed by a results summary line and then the clients table.
Open the New Client Form
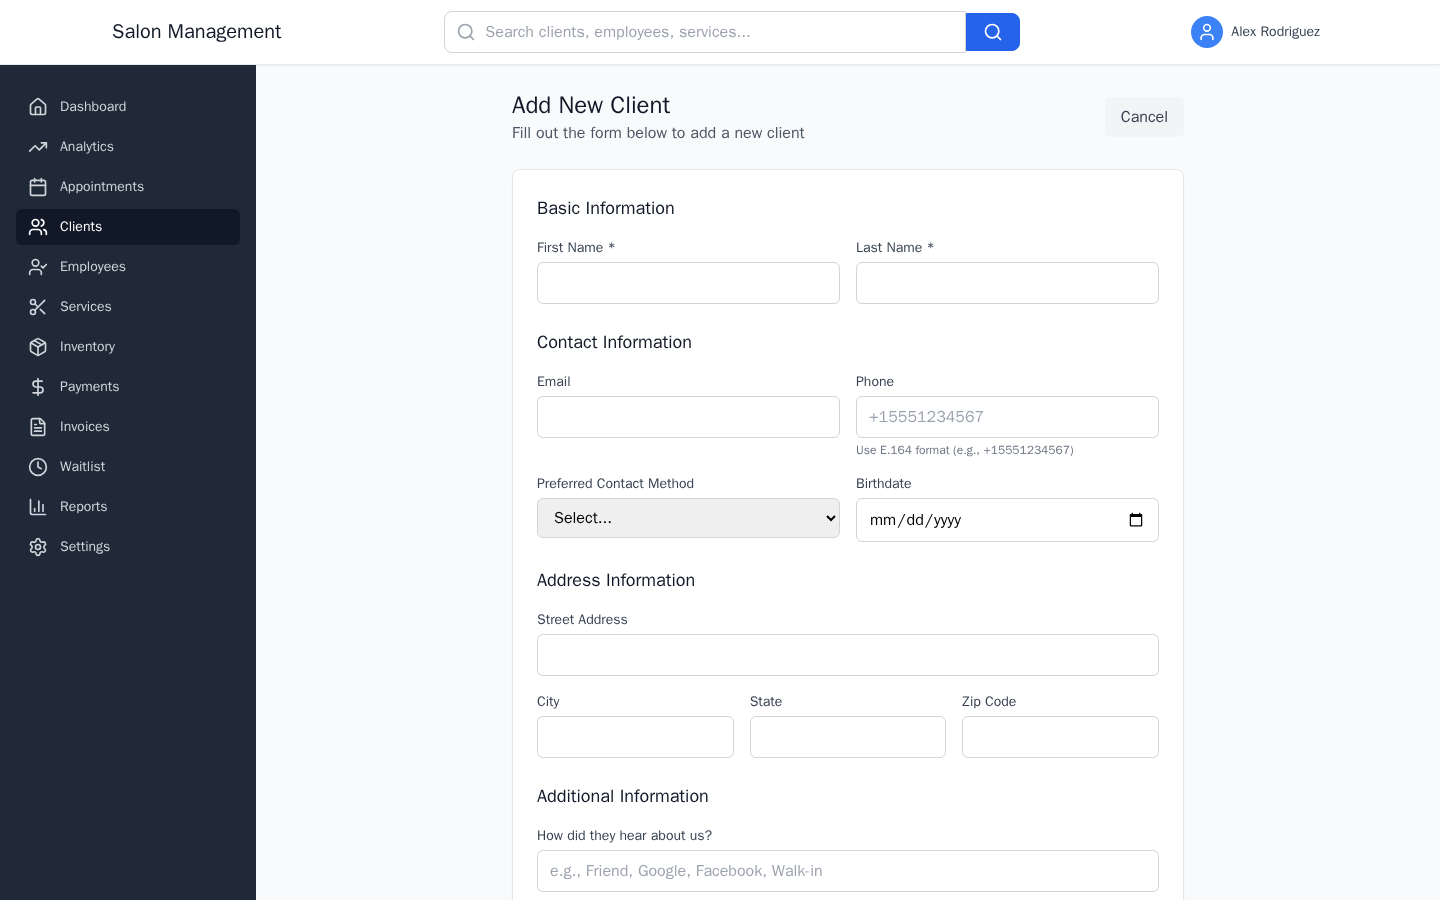
Click the Add New Client button. This navigates you to /clients/new.
What you'll see: A form card headed "Add New Client" with the subheading "Fill out the form below to add a new client". The form is organized into three sections: Basic Information, Contact Information, and Address Information, plus an Additional Information section at the bottom.
Fill In Basic Information (Required)
The Basic Information section contains two required fields:
| Field | Notes |
|---|---|
| First Name * | Required. Minimum 1 character. |
| Last Name * | Required. Minimum 1 character. |
What you'll see: Both fields show a red border and an error message beneath them if left empty on submit. The asterisk (*) in the label indicates the field is required.
Fill In Contact Information (Optional)
The Contact Information section contains four optional fields:
| Field | Notes |
|---|---|
| Must be a valid email address format if provided. | |
| Phone | Use E.164 format: country code followed by the number (e.g., +15551234567). A format hint appears beneath the field. |
| Preferred Contact Method | Dropdown with options: Email, Phone, SMS. |
| Birthdate | Date picker. Used for birthday recognition and marketing. |
What you'll see: The Phone field shows a placeholder +15551234567 and a helper text "Use E.164 format (e.g., +15551234567)". If an invalid email or phone format is entered, a red error message appears on blur.
Fill In Address Information (Optional)
The Address Information section contains:
| Field | Notes |
|---|---|
| Street Address | Free-text field for the street address. |
| City | City name. |
| State | State abbreviation or full name. |
| Zip Code | Postal code. |
These fields are entirely optional and can be left blank.
Fill In Additional Information (Optional)
The Additional Information section contains:
| Field | Notes |
|---|---|
| How did they hear about us? | Free-text referral source. Examples: Friend, Google, Facebook, Walk-in. |
| Active client (checkbox) | Checked by default. Uncheck only if adding an archived or inactive record. |
What you'll see: A checkbox labeled "Active client" is pre-checked. Active clients appear by default in the clients list and in appointment booking dropdowns. Inactive clients are hidden from dropdowns and filtered out of the default list view.
Save the Client Record
Click Create Client at the bottom-right of the form. While saving, the button shows "Creating...". On success, you are redirected to /clients where the new client appears in the table.
If any required field is missing or any value is invalid, a red error message appears beneath the offending field. Fix the error and click Create Client again. Click Cancel in the top-right or at the bottom of the form to discard and return to the clients list.
What you'll see: The new client row appears in the clients table with an Active green status badge and a Created date set to today.
View the Client Detail Page
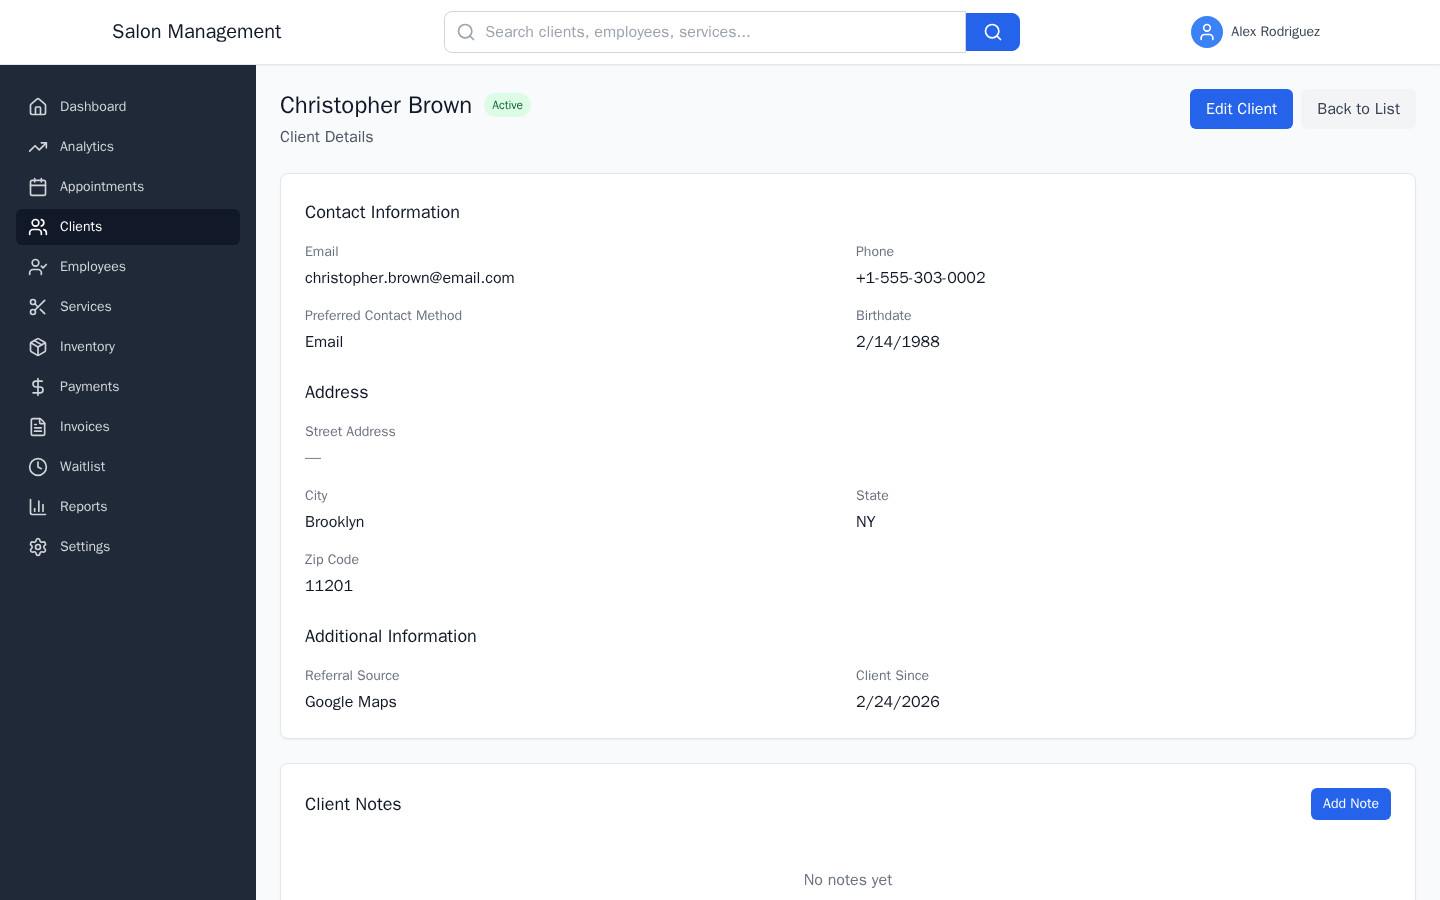
In the clients table, click View in the Actions column for any client. This takes you to /clients/:clientId.
What you'll see: The client's full name as a page heading, followed by an Active/Inactive status badge. Two action buttons appear in the top-right: Edit Client and Back to List. Below the header are two cards:
- Contact Information — shows Email, Phone, Preferred Contact Method, Birthdate, Street Address, City, State, Zip Code, Referral Source, and Client Since date.
- Client Notes — shows all notes for this client with an Add Note button.
Add a Client Note
On the client detail page (/clients/:clientId), click Add Note in the Client Notes section.
What you'll see: A text area expands in place. Type your note (up to 5,000 characters) and click Save Note. The note appears in the list immediately, showing the author's name, timestamp, and an "(edited)" label if the note was later updated.
To edit an existing note, click Edit next to it. The same text area opens pre-filled with the existing text. Click Update Note to save changes. To delete a note, click Delete next to it. A confirmation dialog asks "Are you sure you want to delete this note?". Confirm to remove the note permanently.
Search and Filter Existing Clients
Back on the Clients page (/clients), use the search and filter bar to find specific clients:
| Control | Details |
|---|---|
| Search Clients text box | Searches by name, email, or phone number. Results update as you type. |
| Status dropdown | Filter by: All Clients (active and inactive), Active (default), or Inactive. |
Sortable columns in the table:
| Column | Sort Available |
|---|---|
| Name | Yes (click the "Name" column header) |
| Yes (click the "Email" column header) | |
| Phone | No |
| Status | Yes (click the "Status" column header) |
| Created | Yes (click the "Created" column header) |
Click a column header once to sort ascending, click again to sort descending. An arrow indicator appears next to the active sort column.
Tips & Best Practices
- Always enter the client's email or phone number if available — these are used by the notification system to send appointment reminders.
- Use the How did they hear about us? field consistently so you can analyze referral sources in the Reports section.
- Keep the Active client checkbox checked for all current clients. Only uncheck it when a client has explicitly stopped using the salon, rather than deleting them, to preserve their appointment history.
- If you need to book an appointment for a new walk-in client, register them here first, then immediately start the Booking an Appointment journey.
- Notes are visible to all staff with client access. Use them for allergy information, preferred stylist notes, or any detail relevant to providing good service.
Common Issues
| Issue | Solution |
|---|---|
| "First name is required" or "Last name is required" error on submit | These are the only required fields. Fill them in and resubmit. |
| Phone number format error | The phone field requires E.164 format, for example +15551234567. Include the country code with the + prefix. |
| Client does not appear in the appointment booking dropdown | Check that the Active client checkbox is checked on their record. Inactive clients are hidden from dropdowns. |
| Duplicate client created | Use the search box on the Clients page to find the existing record before creating a new one. If duplicates exist, deactivate the extra record and merge the history manually via notes. |
| "Add New Client" button is not visible | Your role may not have the client:read permission required. Contact your administrator. |
Related Journeys
- Booking an Appointment — Book the client's first appointment after registering them
- First Login & Setup — Understand the platform before adding clients
- Rescheduling & Canceling — Manage appointments after they are booked