Overview
The Invoices section handles formal billing separate from point-of-sale payments. Use it when you need an itemized document -- listing individual services, quantities, unit prices, taxes, and discounts -- that a client can review before paying. Invoices move through a lifecycle from draft to sent to paid (or overdue or voided). The list page defaults to showing outstanding invoices so you always see what needs follow-up.
Prerequisites
- Role required: Admin or Manager (requires
invoices:createpermission) - Before you start: At least one client record must exist in the system.
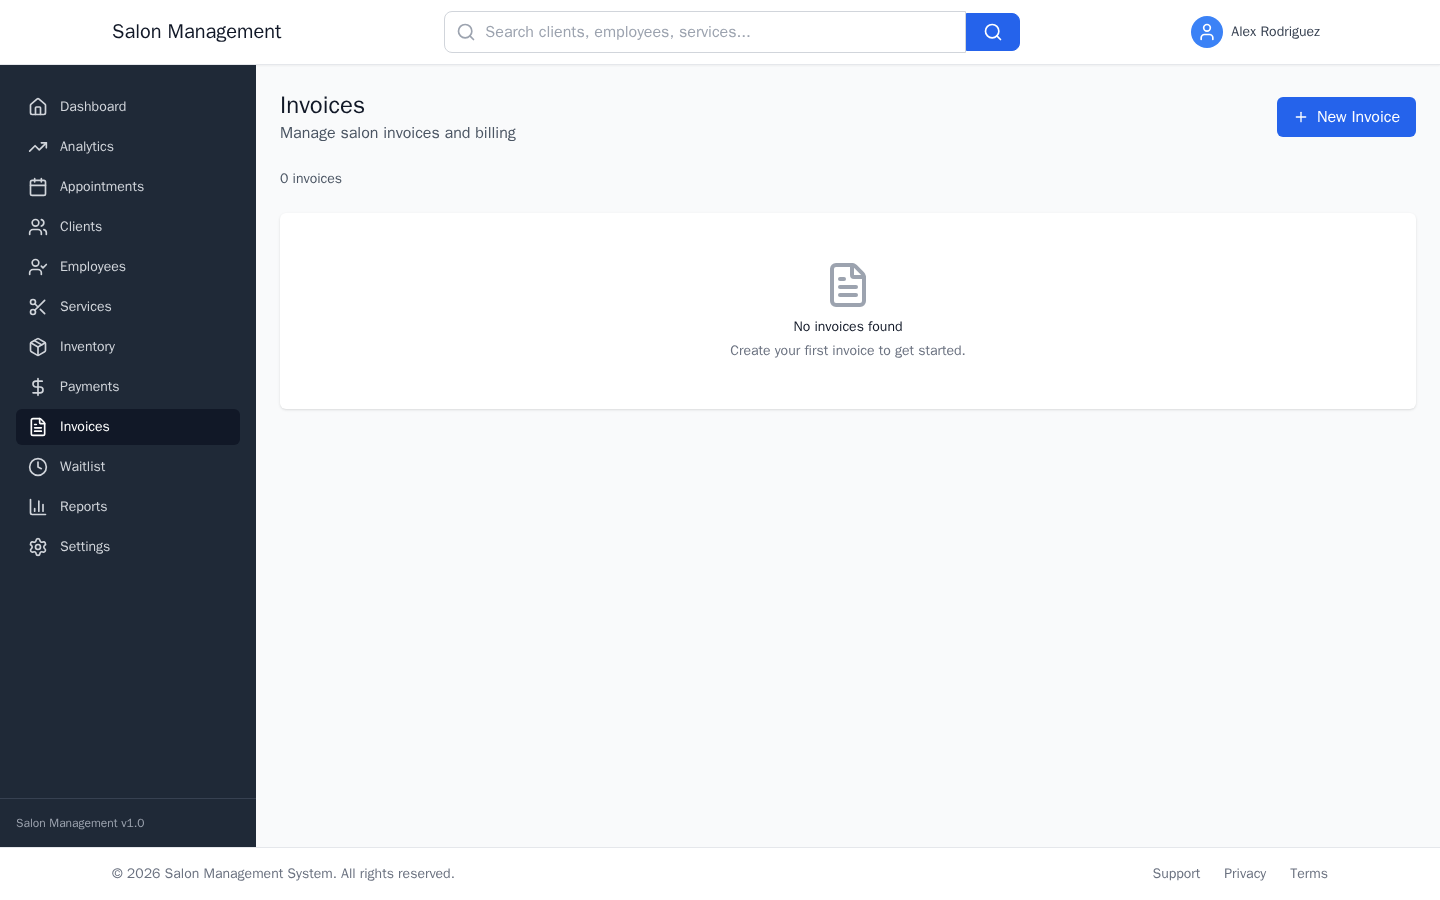
Open the Invoices page
Navigate to /invoices. The page is titled "Invoices" with a subtitle "Manage salon invoices and billing."
What you'll see: The list defaults to outstanding invoices (any invoice that is not yet paid or voided). A count at the top shows how many invoices are displayed. The table shows Invoice #, Client, Date, Due Date, Amount, Status, Balance Due, and Actions columns with "View" and "Edit" links for each row.
Start a new invoice
Click "New Invoice" (blue button with a plus icon, top right). The system navigates to /invoices/new and shows the form titled "New Invoice."
Select the client
The first field is "Client" (required). Click the drop-down and choose from the list of active clients. Each option shows the client's full name and email address.
Fill in invoice header fields
Three fields appear side by side:
| Field | Required | Default | Notes |
|---|---|---|---|
| Invoice Number | Yes | -- | Free text; use a consistent format such as INV-001 |
| Invoice Date | Yes | Today's date | Pre-filled; read-only in edit mode |
| Due Date | No | -- | Date picker; leave blank if there is no fixed due date |
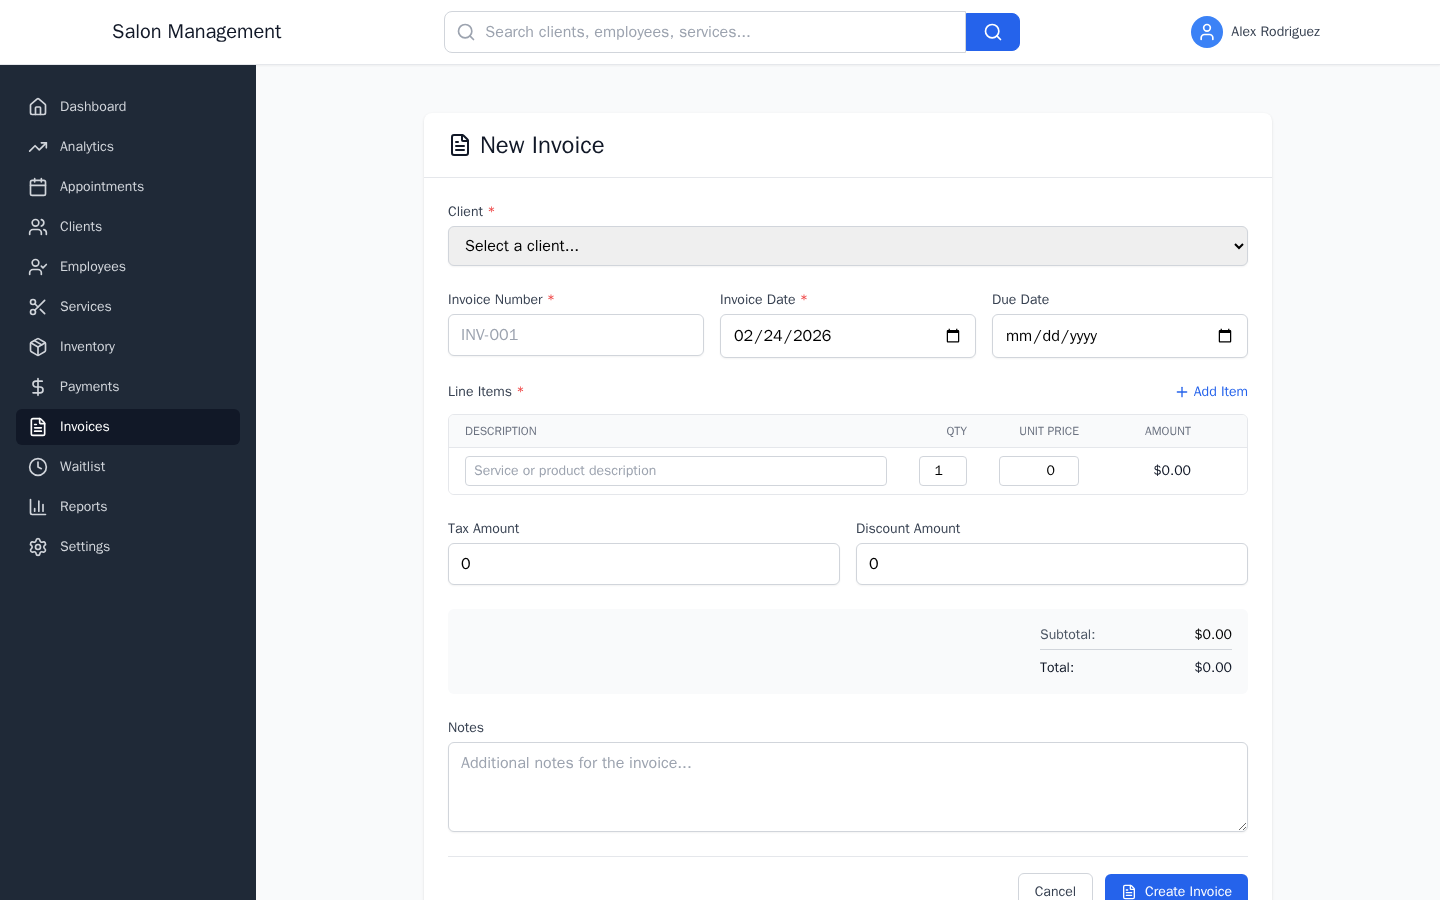
Add line items
The "Line Items" section starts with one empty row. Each row has:
| Column | Notes |
|---|---|
| Description | Free text -- the service or product name |
| Qty | Numeric quantity; defaults to 1 |
| Unit Price | Numeric price per unit |
| Amount | Calculated automatically (Qty x Unit Price); read-only |
| Trash icon | Removes the row; only visible when there are two or more rows |
To add another item, click "Add Item" (blue link with a plus icon, top right of the section header). To remove an item, click the trash icon on that row.
Enter tax and discount amounts
Below the line items table, two fields let you adjust the totals:
- Tax Amount -- a fixed dollar amount of tax to add (not a percentage)
- Discount Amount -- a fixed dollar amount to deduct from the subtotal
Review the totals summary
A summary panel on the right shows the calculated totals:
- Subtotal -- sum of all line item amounts
- Tax -- shown only if Tax Amount is greater than zero
- Discount -- shown in red only if Discount Amount is greater than zero
- Total -- Subtotal + Tax - Discount
These values update live as you edit line items or adjust the tax and discount fields.
Add notes (optional)
The "Notes" text area at the bottom of the form accepts any additional text that should appear on the invoice -- payment terms, special instructions, or a thank-you message.
Save the invoice
Click "Create Invoice" (blue button with a document icon, bottom right). The button shows "Creating..." while saving.
On success, the system navigates to the invoice detail page at /invoices/:id and shows a "Invoice created successfully" notification. The new invoice starts in "Draft" status.
Review the invoice detail page
The detail page is divided into three areas:
Header bar (top): Invoice number and client name. Action buttons appear based on the current status.
Main panel (left, two-thirds):
- "Invoice Details" card -- invoice number, invoice date, due date, and current status
- "Line Items" table -- description, quantity, unit price, and calculated amount for each row, followed by a totals breakdown showing Subtotal, Tax, Discount, Total, Paid amount, and Balance Due
- "Notes" card -- shown only if notes were entered
Sidebar (right, one-third):
- "Client" card -- client name, email, and phone
Send the invoice to the client
Click the "Send" button (blue, with a paper-plane icon). The button shows "Sending..." while the request is in flight. On success, the invoice status changes to "Sent" and a notification confirms "Invoice sent to client."
The "Send" button is available for invoices in Draft or Sent status (so you can resend if needed).
Mark the invoice as paid
When you receive payment (either recorded through the Payments system or confirmed offline), click "Mark Paid" (green button with a check-circle icon). The status changes to "Paid" and the Balance Due drops to zero.
"Mark Paid" is available for all statuses except Paid, Voided, and Cancelled.
Void an invoice if needed
To cancel an invoice that should never be paid, click "Void" (red button with an X-circle icon). A dialog appears asking for a reason. Type a reason in the "Reason" text area (required) and click "Void Invoice." The status changes to "Voided."
Edit a draft invoice
While the invoice is in "Draft" status, click "Edit" (outlined button with a pencil icon) to return to the form. You can change the invoice number, due date, notes, tax, and discount. The invoice date and client are locked after creation.
In edit mode the form title changes to "Edit Invoice" and the submit button reads "Update Invoice."
Invoice Status Lifecycle
→ Overdue (automatic, based on due date)
→ Voided (manual, from any status except Paid/Voided/Cancelled)
Status badges are color-coded:
- Draft -- gray
- Sent -- blue
- Paid -- green
- Overdue -- red (with a "X days overdue" label)
- Voided / Cancelled -- gray
Tips & Best Practices
Common Issues
| Issue | Solution |
|---|---|
| Client drop-down is empty | Only active clients appear. Check the client's status in the Clients section. |
| "Create Invoice" button stays disabled | Ensure at least one line item has a non-empty description and a unit price above zero. |
| Invoice Number field is blank | Invoice numbers are not auto-generated. Enter a number manually before saving. |
| "Edit" button is not visible | Editing is only available for Draft invoices. Sent and Paid invoices cannot be edited. |
| "Mark Paid" is grayed out | The invoice is already in Paid, Voided, or Cancelled status. No further action is needed. |
| Invoice does not appear in the list | The list defaults to outstanding invoices. If the invoice is Paid or Voided it will be hidden. |
Related Journeys
- Processing a Payment -- Record the actual payment transaction after marking an invoice as paid
- Booking an Appointment -- Appointments can also generate invoices automatically via the backend API