Overview
Applies to: Organization Owner, Organization Admin
This journey covers the three Organization management pages: the Organization Dashboard, Organization Settings, and Locations (Salons). These pages give Organization Owners and Admins a bird's-eye view of all locations, let them edit organization-level details, and provide tools to add or review salon locations within their subscription limits.
Prerequisites
- Role required: Organization Owner or Organization Admin
- Before you start: Your multi-location organization must already be set up. You need at least one salon location created to see meaningful data on the Dashboard.
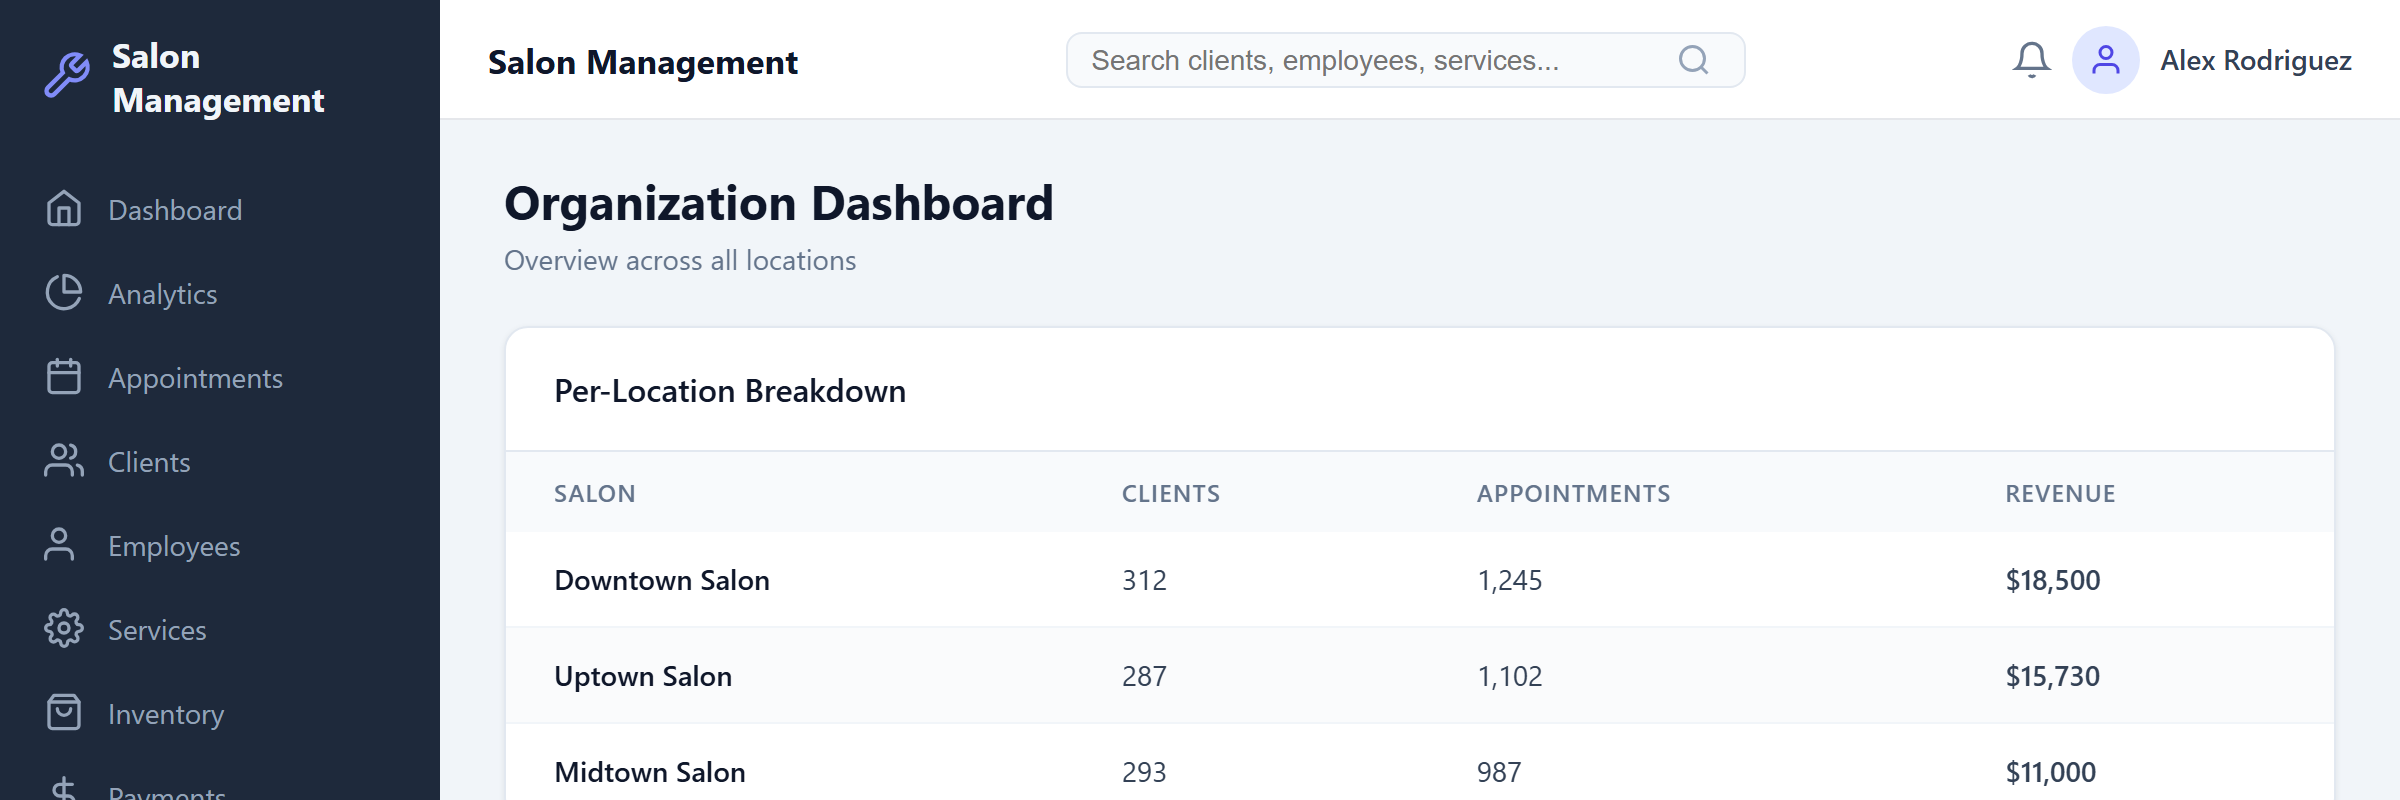
Access the Organization Dashboard
Open the sidebar and navigate to the Organization section. Click Dashboard (or the top-level Organization link). The page loads at the Organization Dashboard.
What you'll see: A page with the heading "Organization Dashboard" and the subtitle "Overview across all locations". Below the header are four summary cards arranged in a single row on desktop (two columns on tablet, one column on mobile). While data is loading, a blue spinner appears in the center of the page.

Read the Summary Cards
The four summary cards provide an at-a-glance view of your entire organization:
| Card | Icon & Color | What It Shows |
|---|---|---|
| Total Salons | Building2 (Blue) | Number of salon locations in your organization |
| Total Users | Users (Green) | Total staff accounts across all locations |
| Total Clients | UserCheck (Purple) | Total client records across all locations |
| Total Revenue | DollarSign (Yellow) | Combined revenue formatted as $X,XXX |
Each card displays a colored icon on the left and the metric label and value on the right.
Review the Per-Location Breakdown
Below the summary cards is the Per-Location Breakdown table. This table lets you compare performance across your salon locations side by side.
| Column | Description |
|---|---|
| Salon | The name of each location |
| Clients | Number of clients at that location |
| Appointments | Total appointments for that location |
| Revenue | Revenue for that location, formatted as a dollar amount |
If no salon data is available, the table shows a single row with the message "No salon data available".
Navigate to Organization Settings
In the sidebar, under the Organization section, click Settings. This takes you to the Organization Settings page.
What you'll see: A page with the heading "Organization Settings" and the subtitle "Manage your organization details and subscription". The page uses a two-column layout on desktop (roughly 2:1 ratio). The left column contains an editable form; the right column shows read-only subscription information.

Edit Organization Details
The left card is titled Organization Details and contains a form with the following fields:
| Field | Type | Required |
|---|---|---|
| Organization Name | Text | Yes |
| Owner Email | Yes | |
| Billing Email | No | |
| Phone | Phone | No |
- Update any of the fields as needed.
- Click the Save Changes button at the bottom-right of the card.
- While saving, the button text changes to "Saving..." and is disabled.
- On success, a green banner appears: "Organization settings saved successfully."
- On failure, a red banner appears with the specific error message.
Understand Your Subscription
The right column shows a read-only Subscription card with the following sections:
| Section | Details |
|---|---|
| Tier | Your subscription tier (displayed capitalized, e.g., "Professional") |
| Status | Current subscription status (e.g., "Active", "Trialing") |
| Trial Ends | Shown only if your subscription includes a trial period |
| Limits | Max Salons, Max Users/Salon, Max Clients |
| Usage | Salons: X / Y (current vs. max), Users: total count |
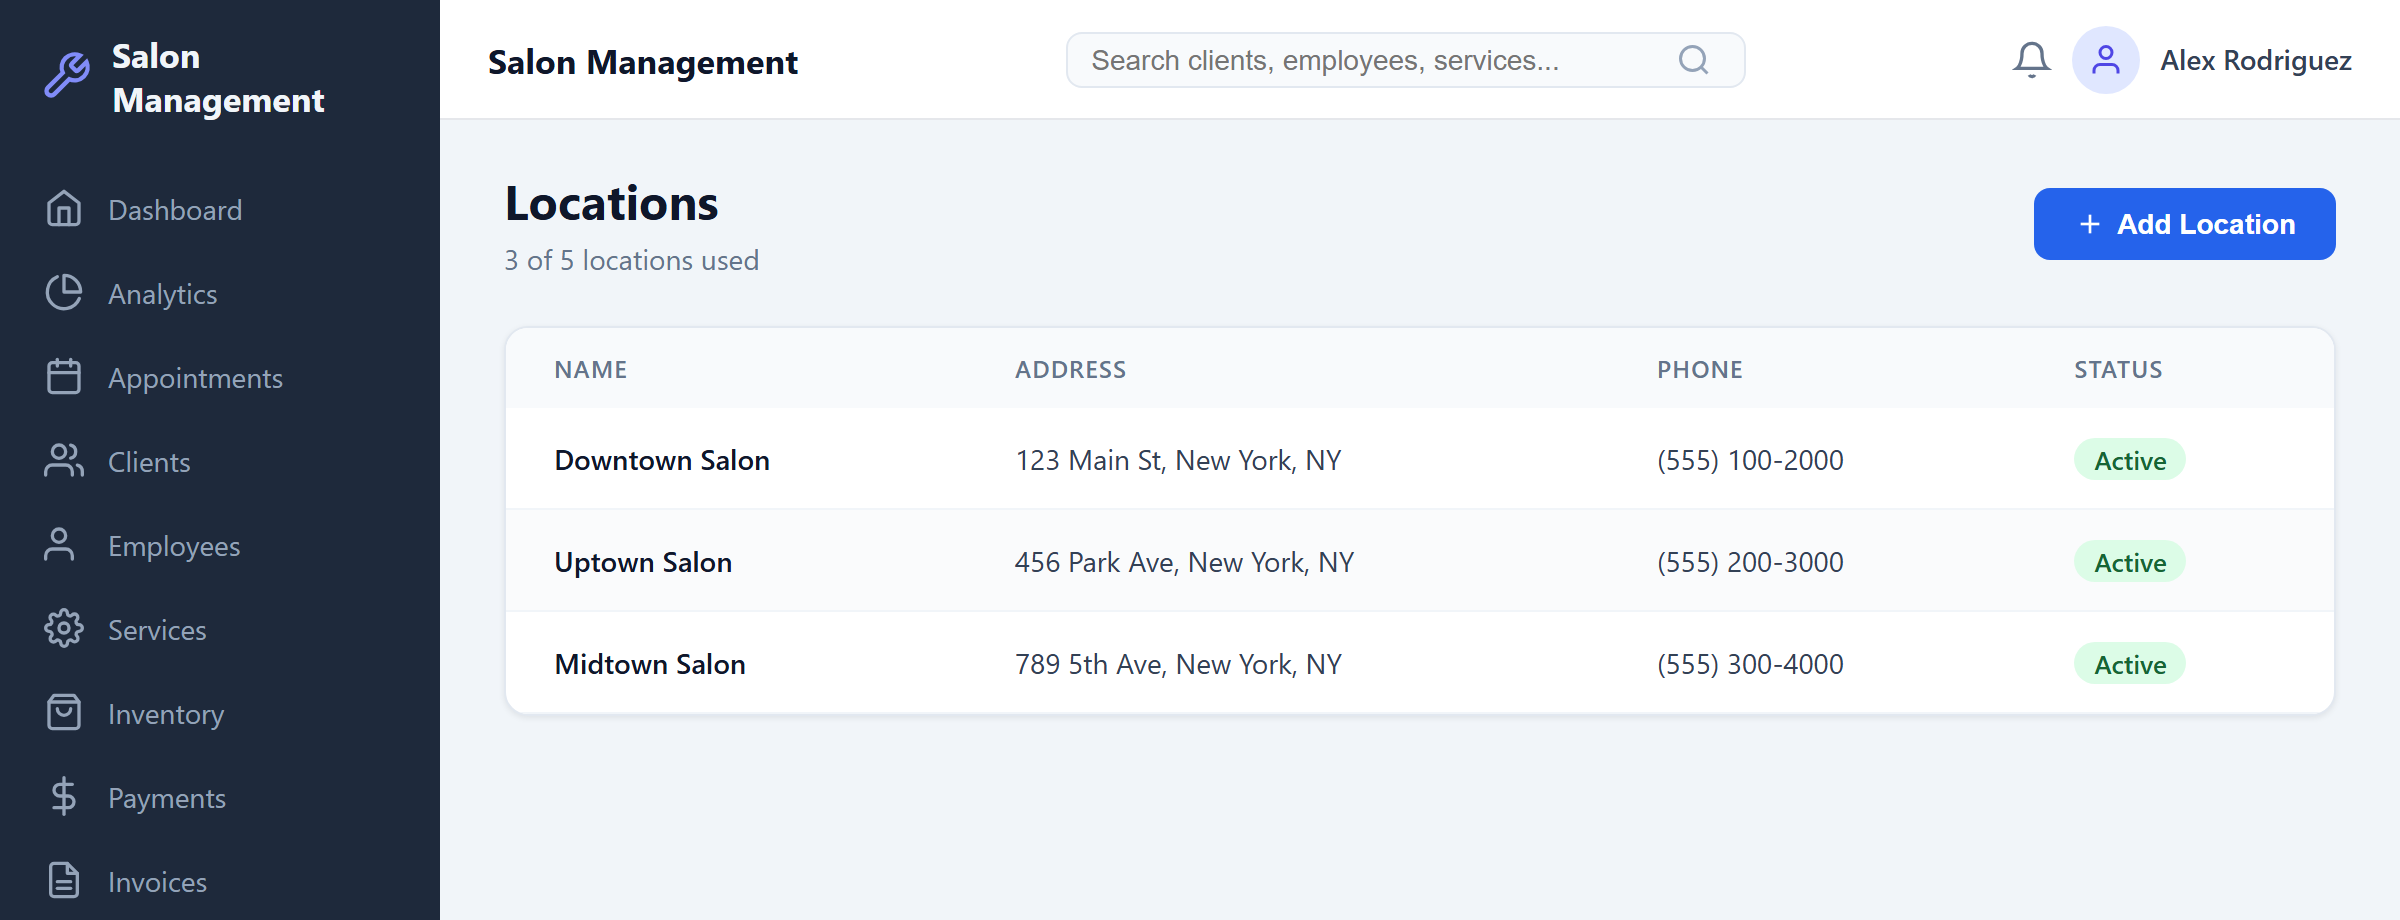
Navigate to Salon Locations
In the sidebar, under the Organization section, click Locations. This takes you to the Locations management page.
What you'll see: A page with the heading "Locations" and the subtitle "X of Y locations used" (reflecting your current count against the subscription maximum). An Add Location button appears in the page header area.
If you have no locations yet, the page shows an empty state: a MapPin icon, the text "No locations yet", and the message "Create your first salon location to get started."
Add a New Salon Location
Click the Add Location button in the page header. If your organization has already reached its maximum salon limit, the button is grayed out and its tooltip reads "Maximum salon limit reached".
A form card appears below the header with the title Add New Location. Fill in the fields:
| Field | Required | Notes |
|---|---|---|
| Salon Name | Yes (marked with *) | The display name for this location |
| Address | No | Street address line |
| City | No | City name |
| State | No | State or region |
| Phone | No | Contact phone number |
- Fill in the Salon Name (required) and any optional address or phone fields.
- Click Create Location to submit. The button shows "Creating..." while processing.
- On success, the form closes automatically and the new salon appears in the list below.
- To discard without saving, click Cancel.

Review Salon Status
The salon list is displayed as a table with the following columns:
| Column | Description |
|---|---|
| Name | The salon location name |
| Address | Formatted as "address, city, state" (shows a dash if no address is set) |
| Phone | The location phone number (shows a dash if not provided) |
| Status | A colored badge: green "Active" or gray "Inactive" |
Use this table to verify that all your locations are correctly configured and active. An "Inactive" status means the location is not currently in use.
Tips & Best Practices
- Check the Organization Dashboard regularly to compare location performance and identify underperforming salons.
- Keep your Owner Email and Billing Email up to date so you receive important account notifications.
- Before adding a new location, verify your subscription limits on the Settings page to avoid hitting the salon cap.
- The Per-Location Breakdown table is useful for quick revenue comparisons without navigating to individual salon reports.
- Address and phone fields are optional when creating a location, but filling them in helps with identification and contact.
Common Issues
| Issue | Solution |
|---|---|
| Dashboard shows "No report data available" | Ensure at least one salon location exists and has data. If the issue persists, refresh the page. |
| "Failed to load report" error on Dashboard | Check your network connection. If the backend is unreachable, try again later. |
| "Add Location" button is disabled | Your organization has reached its maximum salon limit. Upgrade your subscription to add more locations. |
| "Failed to create salon" error | Verify the salon name is provided (it is required). Check for network issues or contact support. |
| Settings save fails with a red error | Ensure Organization Name and Owner Email are filled in (both are required). Check that the email format is valid. |
| Subscription card shows unexpected limits | Subscription data is read-only and reflects your current plan. Contact your account representative to adjust limits. |
Related Journeys
- First Login & Setup — Orient yourself to the platform before managing organization settings
- Switching Between Locations — Switch your active salon context after setting up multiple locations
- Cross-Location User Management — Manage users and roles across your organization's locations
- Configuring Salon Settings — Configure settings for an individual salon location