Overview
The Feedback section lets your team record client ratings and comments after appointments, track NPS (Net Promoter Score) trends, and respond to individual feedback entries. The dashboard surfaces a summary widget so you can monitor satisfaction at a glance without navigating away from your daily view. Use this journey when a client has just had a visit and you want to log their feedback, or when you need to review and respond to previously submitted feedback.
Prerequisites
- Role required: Admin, Manager, and Receptionist can create and manage feedback; Stylists can view feedback; Clients can submit their own
- Before you start: The client's visit should already be recorded in the system. Have the client's name ready to locate them in the dropdown.
Navigate to Feedback
Click Feedback in the main navigation. You'll land on the Feedback list page (/feedback).
What you'll see: A table with one row per feedback entry, showing:
| Column | Description |
|---|---|
| Client | Client's full name, or "Client #ID" if name is unavailable |
| Overall Rating | Star rating (1-5), displayed as filled yellow stars |
| NPS | NPS category badge (Promoter, Passive, or Detractor) with the raw score in parentheses |
| Comment | Truncated comment text; full text is visible on the detail page |
| Submitted | Date the feedback was submitted |
| Actions | "View" link to open the detail page |
The page header shows a results counter ("Showing X of Y feedback entries") and the current page number.
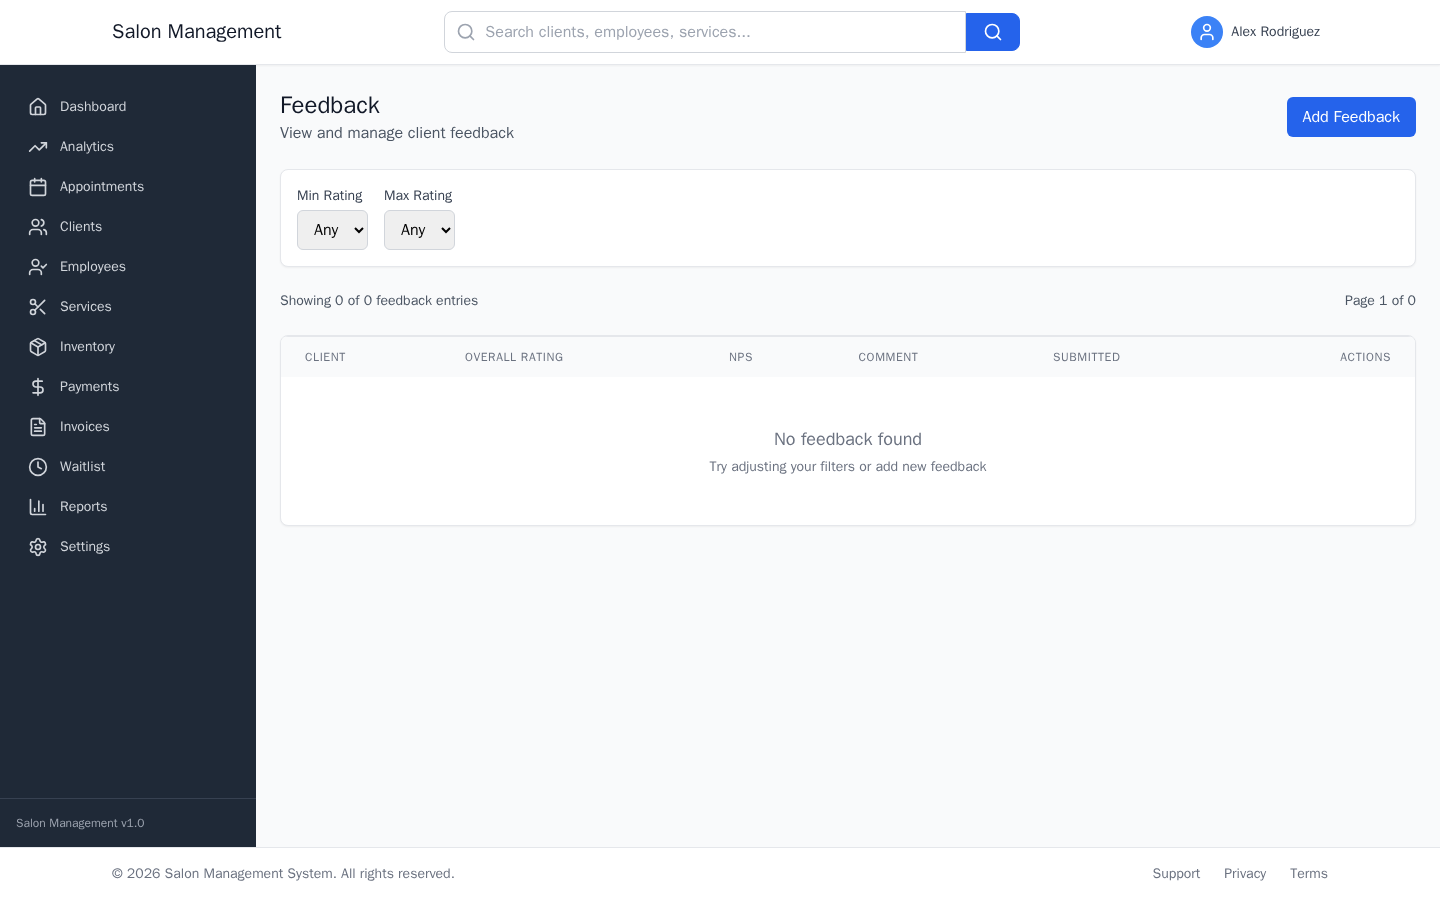
Filter the List
Use the filter controls above the table:
- Min Rating — Select 1-5 to show only feedback at or above this star rating
- Max Rating — Select 1-5 to show only feedback at or below this star rating
Leave either filter set to "Any" to remove that bound. Changing a filter resets to page 1 automatically.
Use the Previous and Next buttons at the bottom of the list to page through results.
Submit New Feedback
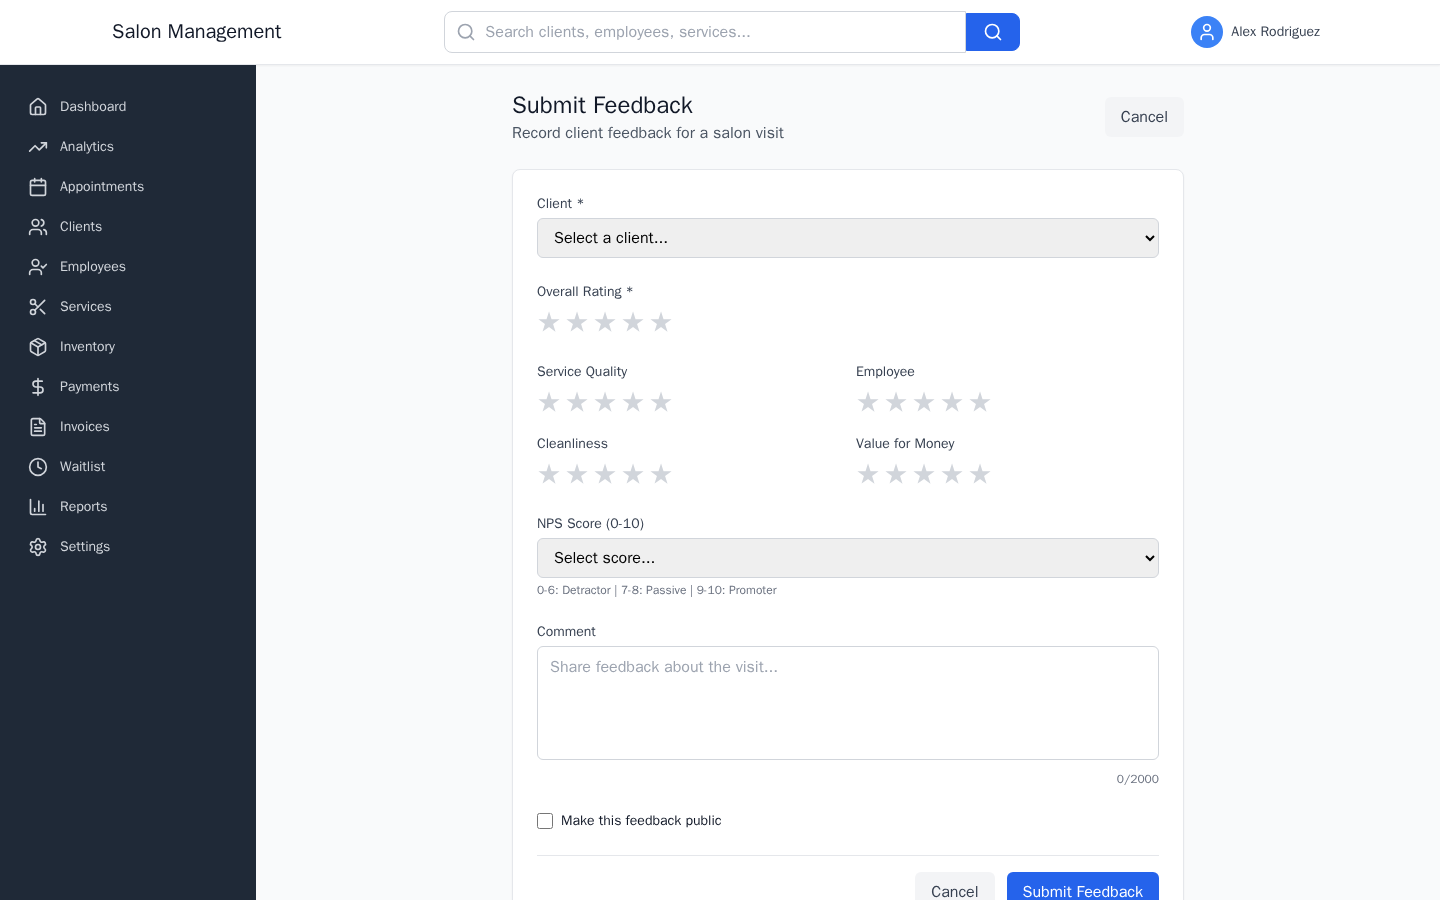
Click Add Feedback (top right). You'll be taken to /feedback/new.
What you'll see: A form titled "Submit Feedback" with the following fields:
Client (required)
A dropdown showing all active clients. Select the client who provided feedback. Type to search.
Overall Rating (required)
An interactive 5-star selector. Click a star to set the rating. The star you click and all stars to its left turn yellow.
Sub-ratings (optional)
Four additional star selectors, each 1-5 stars:
- Service Quality
- Employee
- Cleanliness
- Value for Money
NPS Score (0-10)
A dropdown showing scores 0 through 10, each labeled with its NPS category:
- 0-6: Detractor
- 7-8: Passive
- 9-10: Promoter
The system automatically assigns the NPS category (Promoter, Passive, or Detractor) based on the score you select.
Comment
A free-text area for the client's written feedback. Maximum 2,000 characters. A character counter appears at the bottom right of the field.
Make this feedback public
A checkbox. When checked, this feedback may be displayed publicly. Unchecked means it is private/internal only.
Click Submit Feedback to save. The system enforces one feedback entry per appointment to prevent duplicate submissions. If feedback already exists for the appointment, the backend will return a validation error.
After submission you are returned to the feedback list.
View Feedback Details
From the list, click View on any row. You'll be taken to /feedback/:id.
What you'll see: Three sections of information:
Details section
- Client name, Employee name, and Service name (if linked)
- Visibility badge: "Public" (green) or "Private" (gray)
Ratings section
- Star displays for Overall Rating, Service Quality, Employee, Cleanliness, and Value (sub-ratings only show if they were recorded)
- If an NPS score was submitted: the numeric score out of 10 and the NPS category badge
Comment section
- Full comment text (only shown if a comment was recorded)
Staff Response section
- Shows the existing staff response if one has been submitted, with the response date
- If no response exists, shows a text area for you to write one
Respond to Feedback
On the feedback detail page, scroll to the Staff Response section.
- If no response has been submitted yet, you'll see a text area labeled "Write a response to this feedback..."
- Type your response
- Click Submit Response
What you'll see after responding: The text area is replaced by a blue highlighted box containing your response text and the date it was submitted. Once a response is submitted, it cannot be edited through the UI — contact an admin if a correction is needed.
Monitor Feedback on the Dashboard
The main dashboard includes a Feedback Summary Widget that shows:
- NPS distribution across your Promoters, Passives, and Detractors
- Recent star ratings
You can check this widget daily without navigating to the full feedback list. Use it to spot sudden drops in ratings that need follow-up.
You can also pull aggregated data via the API:
- Salon summary:
GET /feedback/summary— overall NPS distribution and average ratings - Employee summary:
GET /feedback/employee/:employeeId— per-employee rating breakdown
Tips & Best Practices
Common Issues
| Issue | Solution |
|---|---|
| Cannot find the client in the dropdown | The client must exist in the system. Register them first via the Clients page. |
| Feedback submission fails with a duplicate error | Feedback already exists for this appointment. View the existing entry to add a response instead. |
| NPS badge does not appear on the list | The NPS score was not submitted for that entry. Edit or view the record to confirm. |
| Star rating shows as 0 on submission | At least 1 star must be selected for Overall Rating — it is a required field. |
| Response text area not showing | A response may already have been submitted. Scroll up to see the existing response in the blue box. |
Related Journeys
- Daily Dashboard Walkthrough — The Feedback Summary Widget lives here
- Adding an Employee — Employee-level rating summaries are available per employee
- Booking an Appointment — Feedback is tied to appointments; the appointment must exist first